


The information on this page has been copied from DIY3TECH.COM to whom I am most grateful for the advice on enabling the DJI app to work on the Amazon Fire 7
So you want to use your Amazon Fire HD for your DJI Drone but how?
The DJI App’s aren’t in the Amazon App Store so how are you suppose to make it work and is it even possible?
Well yes it is possible as the Amazon Fire HD is simply just an Android Tablet and to use it with your DJI Drone, you simply need to install the Google Play Store on the Amazon Fire HD and you will be able to not only enjoy the DJI Apps, however also all the great apps available on the Google Play store too!
So your next question is going to be. “what magic do I have to do to install the Google Play Store on my Amazon Fire HD?”.
Well I have good news for you, it is pretty simple as you simply need to install 5 applications (APK’s which are Android applications) in order and you will have a fully functional Google Play Store on your Amazon Fire HD!
So lets get started as below we detailed 7 steps which need to be followed in order to make this all work.
Note the Amazon Fire HD will also work the DJI Spark and Mavic via USB OTG (USB On
The Go) and we have successfully used these USB-
NOTE : the one bump you will discover is that the 8 gig version with all the apps installed leaves only about 1 gig left so recommend buying at least a 16gig version. AND change the default storage location from Internal Storage to the SD card.
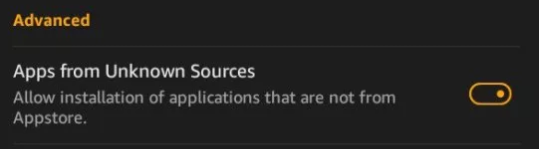
Security Note: You will probably have to change your “security” settings in the Fire which is was done by going (1) Settings (2) Security (3) Advanced then toggling on Apps from Unknown Sources as you see in this picture.
Step 1: Using the Silk browser of the Amazon Fire HD, go this page:
video-
Step 2: Install ES File Explorer from the Amazon App Store as we will use this to “run” all of the other applications we will download:
Click this link-
Step 3: Install the Google Account Manager APK by clicking the link below:
Click this link-
(A) When promoted in Silk,
(1) open in another browser tab,
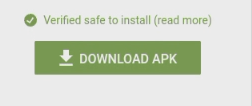
(2) switch to that [browser tab] and scroll down until you see the DOWNLOAD APK button (note that in some cases there might be a warning that there is a newer version of this application, don’t worry about this and simply click the DOWNLOAD APK button as after installation and in the Google Play Store you will have the opportunity for an automated upgrade) :
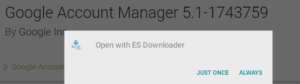
(B) You will be asked where you want to open the APK at,
(1) select ES Downloader and
(2) Just once:
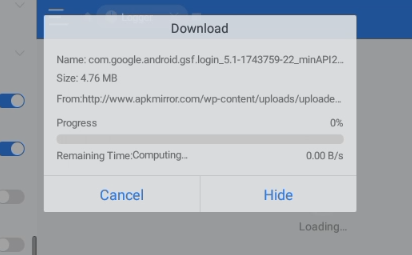
(C) You should now see the file being downloaded, do nothing at this point other than wait for the file finish downloading:
(D) After the download has completed you will prompted with a dialog,
(1) select Install from the three choices:
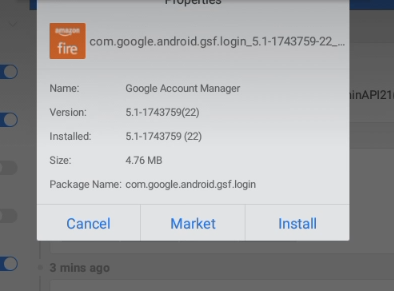
(E) After tapping Install in Step D, you will be presented with a darker screen,
(1) scroll to the very bottom and on the very bottom right you will see “INSTALL”, go ahead and tap it to install the application.
![]()
(F) After installation in the prior step, After the app is installed now tap the “DONE” button.
You may find that the dialogue to install the apps pops up at the end of each download in which case do it then
At this point, return to your Silk Browser and this page to (1) move to the next step:
Step 4: Install the Google Google Services APK by clicking the link below:
Click this link-
(A) When promoted in Silk,
(1) open in another browser tab,
(2) switch to that [browser tab] and scroll down until you see the DOWNLOAD APK button (note that in some cases there might be a warning that there is a newer version of this application, don’t worry about this and simply click the DOWNLOAD APK button as after installation and in the Google Play Store you will have the opportunity for an automated upgrade) :
A similar process to that undertaken in Step 3 will now take place. Take the same actions
Step 5: Install the Google Play Services APK by clicking the link below:
Click this link-
Take actions as in steps 3 and 4.
Step 6: Install the Google Play Store APK by clicking the link below:
Click this link-
Take actions as in steps 3, 4 and 5.
Step 7: Delete the downloaded files to recover space on tablet. The easiest way
to do this is to connect the Amazon Fire HD Tablet to your computer via standard
micro USB cable and select Fire-

To see explanatory video click HERE
This information came from
http://video-
Go there for further clarification, detail or changes
I have personally found that getting the OTG cable connection to work with the Amazon Fire 7 can take a bit of cable fiddling and switching the app on and off a few times. However, once connected it does seem to remember the settings next time